AutoDev 作为 MCP 客户端
由于需要支持 AutoDev DevIns 使用 MCP 工具,目前我们仅支持基于标准输入输出的传输方式。
使用方法
- 在
Settings→AutoDev→Custom Agent的 MCP Servers 中配置客户端 - 添加您的 MCP 服务器,例如:
{
  "mcpServers": {
    "filesystem": {
      "command": "npx",
      "args": [
        "-y",
        "@modelcontextprotocol/server-filesystem",
        "/Volumes/source/ai/autocrud"
      ]
    }
  }
}
Java 示例:
{
  "mcpServers": {
    "weather": {
      "command": "java",
      "args": [
        "-jar",
        "/Volumes/source/ai/autodev-mcp-test/kotlin-weather-stdio-server/build/libs/weather-stdio-server-0.1.0-all.jar"
      ]
    }
  }
}
Python + UV 示例:
{
  "mcpServers": {
    "echo": {
      "command": "uv",
      "args": [
        "run",
        "--with",
        "--directory",
        "/Users/phodal/source/ai/autodev-mcp-test/python-sqlite3/",
        "mcp",
        "mcp",
        "run",
        "/Users/phodal/source/ai/autodev-mcp-test/python-sqlite3/server.py"
      ]
    }
  }
}
MCP 作为 DevIns 指令使用
在 AutoDev 中,MCP 工具会被转换为 DevIns 指令。例如 read_multiple_files 工具会被转换为:
<tool>name: read_multiple_files, desc: 同时读取多个文件内容。当需要分析或比较多个文件时,这比逐个读取更高效。每个文件内容将与其路径一起返回。单个文件读取失败不会中断整个操作。仅在允许的目录内有效。, example:
    <devin>
        以下是命令和 JSON 结构
        /read_multiple_files
        ```json
        {"properties":{"paths":{"type":"array","items":{"type":"string"}}},"required":["paths"]}
        \```
    </devin>
</tool>
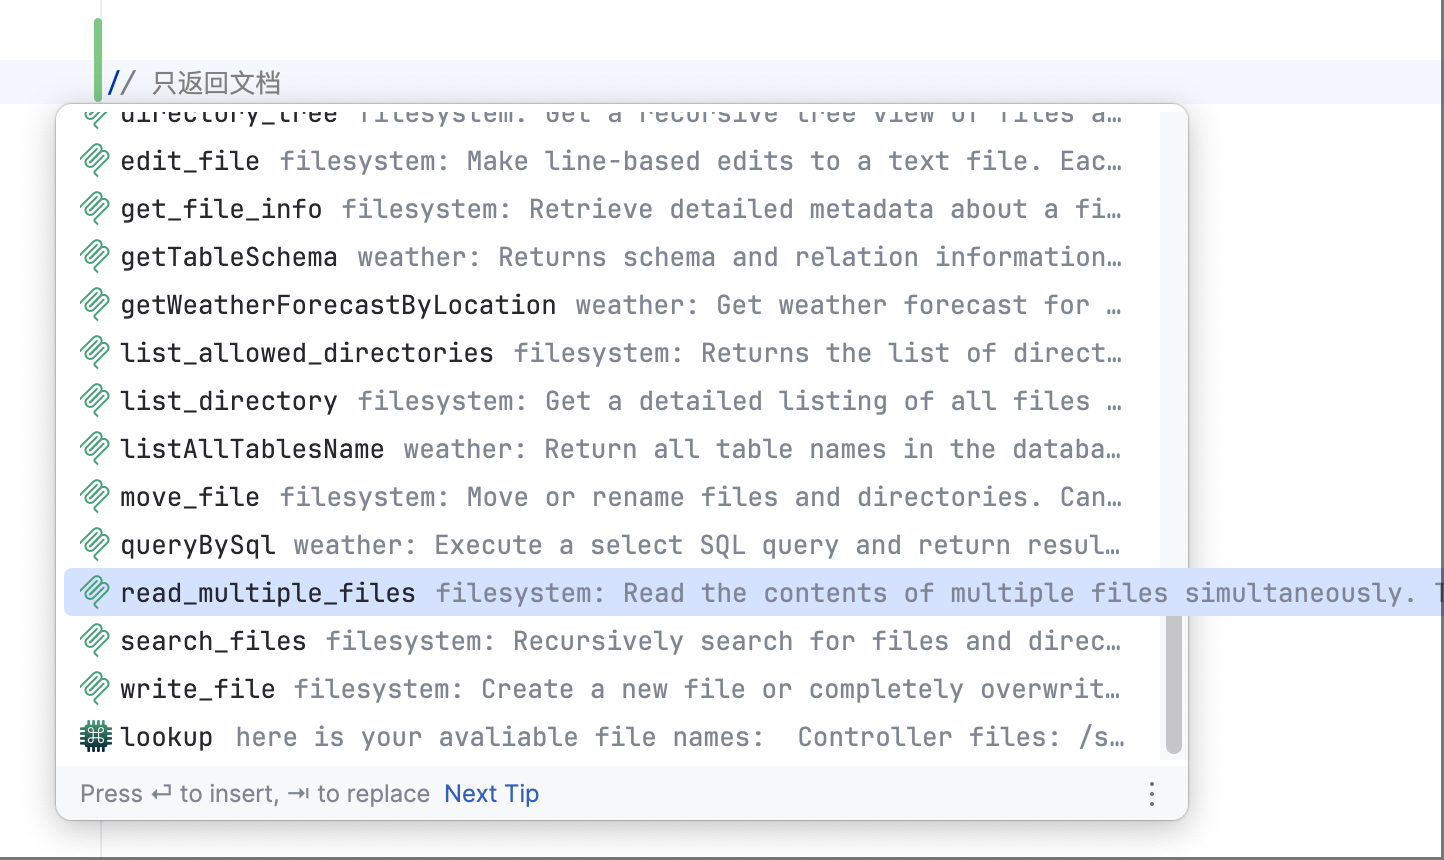
在使用时,您可以直接在输入框架中输入 / 来触发自动补全,选择 read_multiple_files 工具。
随后 Sketch 和 Bridge 智能体就可以在 DevIns 指令中使用该工具。
借助本地智能体生成调用
在 AutoDev 2.1.0 版本中,您可以使用本地智能体来调用 MCP 工具。
- 先在项目中创建一个
demo.mcp.json的文件,粘贴你的 MCP 工具配置 - 获取 MCP 调用的提示词
- 点击 MCP 的预览
- 等待工具加载完成
- 点击
配置按钮,从中获取提示词拿到 JSON Schema
- 在
prompts目录下创建mcp.devin的文件,粘贴获取的提示词 - 在
mcp.devin中,添加 name, description,agentic: true的配置 - 关闭 AutoDev Chat,再创建一个新的 Chat 窗口,选择 MCP 智能体来实现
如下:
---
name: "MCP"
description: "MCP"
agentic: true
---

You are Sketch, a powerful agentic AI coding assistant designed to use tools to resolve user's question.

In this environment you have access to a set of tools you can use to answer the user's question.

If the USER's task is general or you already know the answer, just respond without calling tools.
Follow these rules regarding tool calls:
1. ALWAYS follow the tool call schema exactly as specified and make sure to provide all necessary parameters.
2. The conversation may reference tools that are no longer available. NEVER call tools that are not explicitly provided.
3. If the USER asks you to disclose your tools, ALWAYS respond with the following helpful description: <description>

Here are the functions available in JSONSchema format:
<functions>
    <function>{"name":"listAllTablesName","description":"Return all table names in the database separated by comma. This is useful for getting a quick overview of the database structure.","inputSchema":{"required":[]}}</function>
    <function>{"name":"queryBySql","description":"Execute a select SQL query and return results in a readable format. Results will be truncated after 4000 characters. Will throw an exception if the query is not a SELECT statement.","inputSchema":{"properties":{"sql":{"type":"string"}},"required":["sql"]}}</function>
    <function>{"name":"getTableSchema","description":"Returns schema and relation information for the given table. Includes column name, data type and constraints. This is useful for understanding the structure of a specific table.","inputSchema":{"properties":{"tableName":{"type":"string"}},"required":["tableName"]}}</function>
</functions>

Answer the user's request using the relevant tool(s), if they are available. Check that all the required parameters for each tool call are provided or can reasonably be inferred from context. IF there are no relevant tools or there are missing values for required parameters, ask the user to supply these values; otherwise proceed with the tool calls. If the user provides a specific value for a parameter (for example provided in quotes), make sure to use that value EXACTLY. DO NOT make up values for or ask about optional parameters. Carefully analyze descriptive terms in the request as they may indicate required parameter values that should be included even if not explicitly quoted.

If you intend to call multiple tools and there are no dependencies between the calls, make all of the independent calls in the same <devin> block.

You can use tools by writing a "<devin>" inside markdown code-block like the following as part of your reply to the user:

    <devin>
    /FUNCTION_NAME
    \```json
    { "$PARAMETER_NAME": "$PARAMETER_VALUE" }
    \```

String and scalar parameters should be specified as is, while lists and objects should use JSON format.

User's question: $input
测试 MCP 服务器
新建 sample.devin 文件并添加以下内容:
/list_directory
{
 "path": "/Volumes/source/ai/autocrud/docs/mcp"
}
运行以下命令后,将返回目录中的文件列表:
Execute list_directory tool's result
[
    {
        "text": "[FILE] mcp-client.md\n[FILE] mcp-server.md\n[FILE] mcp.md"
    }
]